Photo Enhancement Basics
I have been asked lately about my photos. Specifically, how do I get such “good shots”. The answer is easy. I doctor them up after I shoot them. The two easiest things to do to make your photos look richer and more detailed is to adjust the Brightness and Contrast. You can do this in any photo editor. I use iPhoto, and when I want to get even more detailed, Photoshop.
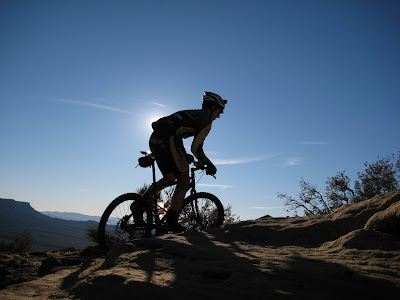
For example, here is a shot of Chris Plesko on the South Rim of Gooseberry Mesa. The image below is how the camera saw it. I have done nothing to it.
It’s not a bad shot as is. But a little fine tuning will add subtle differences that will help it out some.
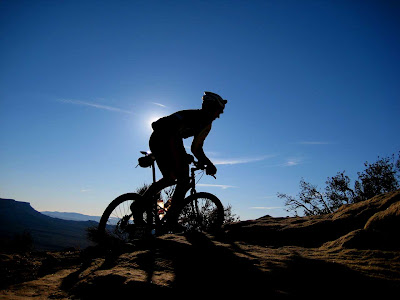
In this next version I simply brought down the brightness, and upped the contrast. This will bring out the colors more, and also darken the darks, and brighten the lights. I usually just drag the slider until I feel it looks “right”. It can be fun to play with the settings to get different effects. I also upped the saturation just a bit to help the colors pop.
You can see now how the shadows on the rocks are darker, making them stand out more against the rock. The rock also is richer in color adding more contrast against the sky. Chris is more silhouetted, which I think adds to the “cool factor” of the shot. Of course that can be a preference thing.
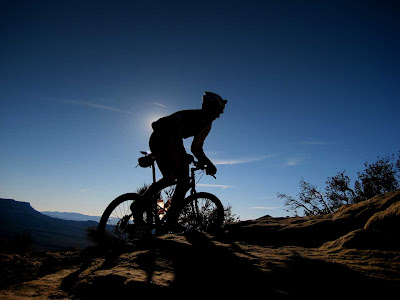
In this final image, I added a gradient to the sky with Photoshop. I find that gradients add depth to the image, and can help emphasize the subject of the photo a little more as well.
All of these adjustments take about 5 minutes to make, and can help enhance the look of photos shot with any camera.
So there you have my secret to making photos look just a little bit better.
Today’s weight: 180.5


4 Comments
Jason
January 22, 2008Hey nice tips. Oddly I use PhotoShop every day, but for news print. So I have all these print habits ingrained in me. I need to start accepting what I can do on web and not think about how “dark” something might print. It’s the whole old dog/new tricks thing. 😉
Ed
January 22, 2008Post-processing helps and adds some interesting tweaks but you “see” great shots and I like your picture compositions overall. Cropping is also a much used tool in my belt.
The pre-Moab 24 Hour shot you took in the fall of all the racers lined up is still one of my favorites.
By the way, good job on abstaining from empty liquid calories. Water, water, water! When you’re thirsty, drink water. You’ll get used to the ordinariness of it all.
Ed
KanyonKris
January 23, 2008I agree with Ed, you do have a good eye, Adam. But the point is well taken that some relatively simple tweaks can make even ordinary photos look a lot better. I used to use a heavy-duty image editor (GIMP) for all my photos, but I’ve switched to Picasa for my photo workflow.
Picasa makes these image tweaks dead simple. First I try the “I’m Feeling Lucky” button. It works 50% of the time. But often it will over-correct the color so I undo then try “Auto Contrast” and “Auto Color” and keep the corrections that work. Auto Contrast works almost every time and makes the image look much better. Then I use the Fill Light slider to bring detail out of the shadows (i.e. backlit faces) without blowing out the highlights, if it needs it. Cropping, straightening and red eye removal are also simple. It also does a good job of importing photos from my camera and helps me organize them all.
And best of all Picasa is free (it was a Google acquisition). It works well with Picasa Web Albums to make it super easy to upload photos for all to see and to use in my blog.
Now with Picasa, I only use GIMP for only the tricky images.
Brendan
February 1, 2008I just stumbled onto your blog via MTBR – nice writing and pics! I just discovered the joys of iphoto as I just bought a Mac. It almost feels like cheating, almost 😉